If you’re anything like us, your favorite hat isn’t just headwear, it’s an extension of your style, a piece of art, or a subtle nod to your personal brand. When you invest in a custom embroidery patch hat, you want it to look as crisp and vibrant years from now as it did the day you first put it on.
The good news? With the right routine, your hat can look sharp and last for years.
The bad news? Treating it like a regular piece of laundry can quickly lead to disaster: warped brims, frayed patches, and faded colors.
As experts in custom headwear design and longevity, we’ve put together this comprehensive guide on embroidery patch hat care. We’ll walk you through step-by-step cleaning methods, maintenance tips, and what to avoid so your favorite custom hat stays in perfect condition.
Ready to keep your prized patch hat looking brand new? Let’s dive in.
Why Embroidery Patch Hats Need Special Care
A standard ball cap is relatively simple, but an embroidery patch hat is a complex combination of materials and construction methods all of which require a gentle touch.
- The Structure: Most hats have a stiff inner structure (the buckram) that gives the crown its shape. Exposure to high heat or aggressive agitation (like a washing machine) can dissolve the glue and permanently ruin the hat’s structure, leaving it floppy and misshapen.
- The Patch: Whether your patch is an intricate machine embroidery design or a woven appliqué, it’s a separate piece of material attached to the hat fabric. Patches are either sewn on (the most durable method) or heat-pressed (using a temporary, pressure-sensitive adhesive). Excessive heat or harsh chemicals can weaken the patch’s adhesion or cause the embroidered threads to fray.
- The Brim: The brim often contains cardboard or a plastic insert. A washing machine can cause cardboard to crumble or plastic to crack, making proper shaping impossible.
Understanding these components is the first step in mastering proper hat maintenance.
Know Your Hat Materials
Before you start cleaning, you need to know what you’re working with.
- Hat Fabric:
- Cotton or Twill: Durable and common, but prone to shrinking and color fading if exposed to hot water or harsh chemicals.
- Wool/Wool Blends: Highly sensitive to heat and moisture. Must be spot cleaned and air-dried carefully to avoid shrinkage.
- Polyester Blends: Generally more colorfast and resistant to shrinkage, making them slightly easier to maintain.
- Embroidery Threads: The threads are usually made of polyester or rayon. While durable, they can bleed color if soaked in hot water or scrubbed too vigorously.
- Sweatband: This area needs the most attention. It’s typically cotton or a moisture-wicking synthetic that traps oils, sweat, and makeup.
Pre-Cleaning Prep: The Necessary Checks
Before any water touches your hat, follow these two essential steps:
- Check the Manufacturer’s Label: Always check the inside label for specific fabric content and any ‘Do Not’ symbols. If it says “Dry Clean Only,” listen!
- Spot Test for Colorfastness: Lightly dampen a cotton swab with your cleaning solution (we recommend a mild detergent and water) and gently dab an inconspicuous area inside the hat, like the back of the bill or inside the crown. If any color transfers to the swab, use plain cold water only.
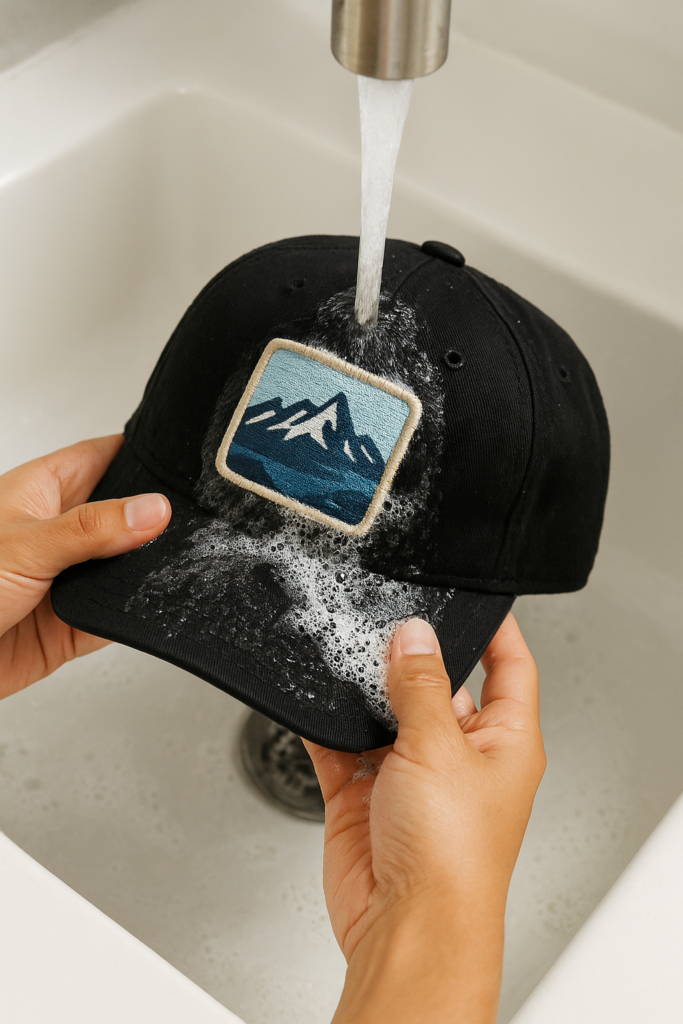
Hand Washing Method: Your Best Bet
When it comes to washing embroidered hats, the hand-washing method is the safest, most effective way to clean your hat without risking damage.
What You’ll Need:
- A clean sink or basin
- Cold water
- Mild laundry detergent (or an oxygen-based cleaner for tough stains)
- A soft-bristle brush (like a new toothbrush or soft cleaning brush)
- Clean, absorbent towels
Step-by-Step Instructions:
- Prepare the Solution: Fill your basin with cold water. Add a tablespoon of your mild detergent or specialized hat cleaner and mix it gently.
- Target the Sweatband: This is the priority. Dip your soft-bristle brush into the solution and gently scrub the sweatband area using small, circular motions. The detergent will work to break down the oils and residue.
- Clean the Crown and Brim: Gently dampen the rest of the hat, avoiding complete submersion if possible. Dip your cloth or brush into the solution and lightly work it into the fabric and the patch. Focus on any visible stains. Do not scrub the embroidery patch roughly. Scrubbing can damage the threads. Use a blotting and gentle rubbing motion instead.
- Rinse Thoroughly: This is critical. Drain the dirty water and refill the basin with fresh, cool water. Dip the hat in and out, or hold it under the tap, letting cool water run over the hat until all soap residue is gone. Remaining soap can leave a white residue once dry.
- Press Out Excess Water: Gently press and roll the hat inside a clean towel to remove as much moisture as possible. Do not wring or twist the hat.
Deep Cleaning Tips for Tougher Stains
For stubborn stains (like grass or makeup) that don’t come out with mild soap, use a specialized enzymatic spot remover or a paste made from baking soda and water. Apply the paste directly to the stain, let it sit for 10–15 minutes, and then gently scrub and rinse following the hand-washing steps above.
Drying and Shaping: The Art of the Perfect Fit
The drying process is where many hats get ruined. Follow these steps to prevent warping and keep the proper shape:
- Air Dry ONLY: Never put your patch hat in a dryer. The heat will shrink the fabric, warp the brim, and ruin the glue holding the crown together.
- Maintain the Shape: Immediately after washing, you need to shape the hat while it’s still damp. Place the hat over a rounded object that matches your head shape—a clean coffee can, a balloon, or a specialized hat shaper works perfectly.
- Drying Environment: Allow the hat to air dry completely in a well-ventilated area away from direct sunlight or heat. Direct sun can cause fading and accelerate structural damage.
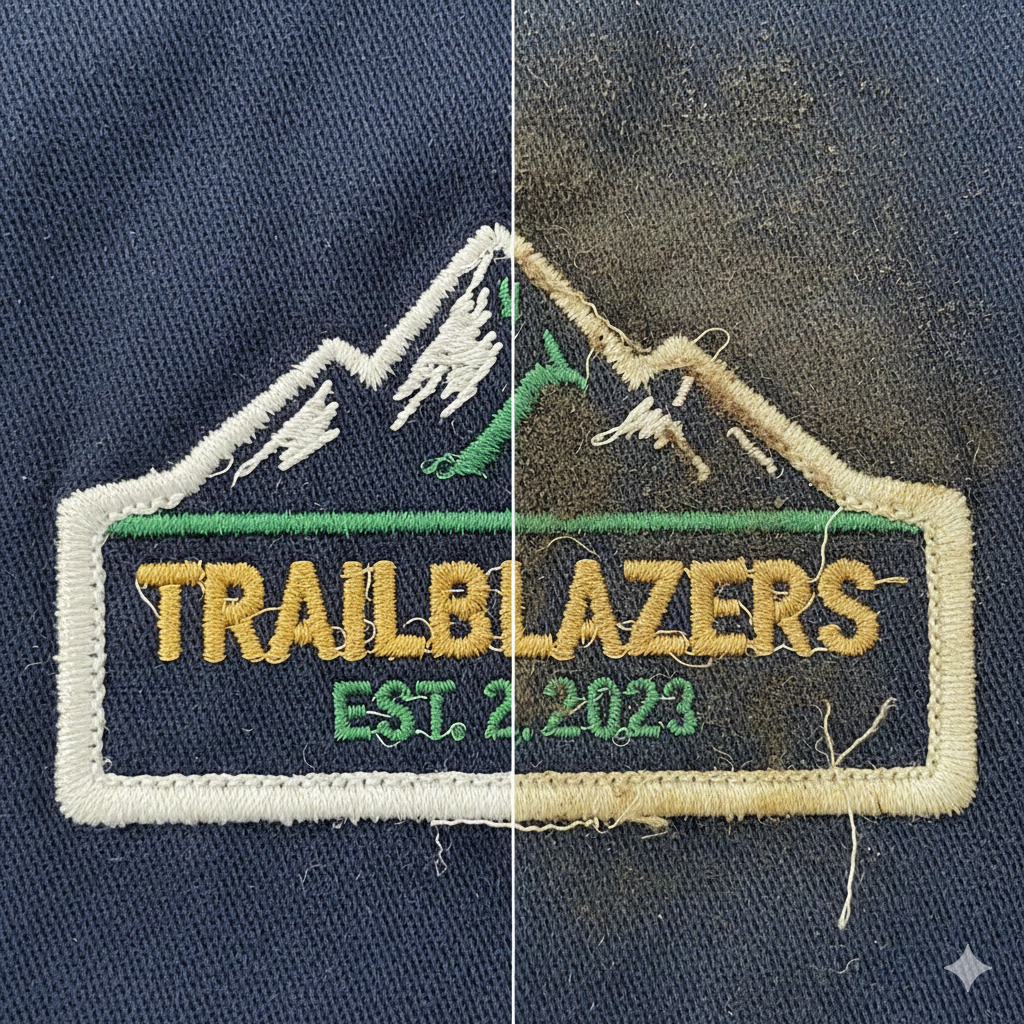
What NOT to Do: Common Mistakes That Damage Embroidery
Proper patch hat tips always start with knowing the major don’ts. These actions are the quickest way to ruin your beloved hat:
| DO NOT | The Damage It Causes |
| Use a Washing Machine or Dryer | Warps the brim, shrinks the fabric, dissolves internal structure. |
| Use Bleach or Harsh Chemicals | Fades the hat fabric, weakens and discolors the embroidery thread. |
| Use Hot Water | Causes shrinkage (especially with cotton/wool) and can loosen adhesives. |
| Scrub the Embroidery Patch | Fraying, pilling, and pulling of the embroidered thread loops. |
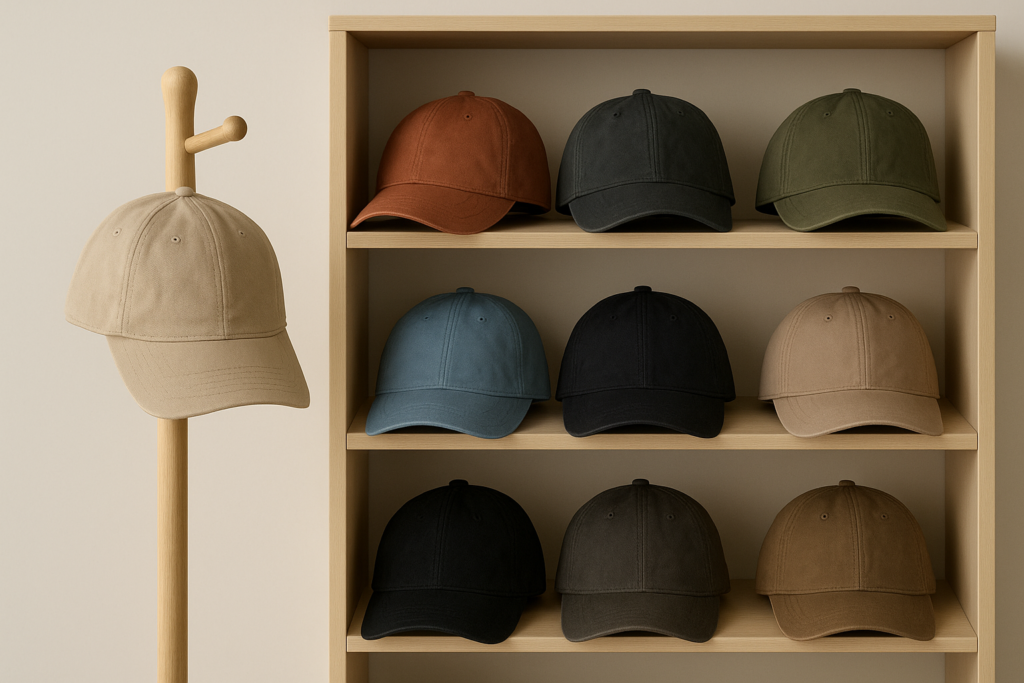
Storing and Maintaining Your Hat: Long-Term Care
Maintenance is key to avoiding frequent deep cleaning.
- Store Properly: Keep your hats in a cool, dry place. A hat rack, a dedicated shelf, or a breathable box is ideal. Never leave a damp hat crumpled up in a locker or gym bag, as this encourages mildew and odor.
- Protect from Sun: Prolonged exposure to intense sunlight will fade both the hat fabric and the embroidery threads. Be mindful of where you leave your hats, especially during the hot Utah summers.
- Spot Clean Regularly: Don’t wait for a stain to set. Wipe away dirt and perspiration from the sweatband with a damp cloth after every few wears.
When to Replace or Refresh Your Patch
If your hat’s patch or embroidery has sustained significant damage like deep tears, extensive fraying, or irreversible fading it may be time to consider a refresh.
Sometimes, the best solution is simply a new canvas for your style. Whether you’re looking to update a faded corporate logo or create a fresh statement piece, we can help you design a hat that’s even better than the original.
Conclusion: Keep Your Custom Look Crisp
Your embroidery patch hat is an investment in your personal style and brand. By using cold water, a mild detergent, gentle hand washing, and proper air drying, you can ensure that your custom design remains crisp, your colors vibrant, and your hat shape intact for years to come.
With a little dedication to hat maintenance, you’ll be ready to rep your style with confidence every time you step out the door.
Ready to Design Your Next Custom Hat?
At Vienna Hat Co., we are dedicated to quality, longevity, and helping you express your unique style.
Hi, this is a comment.
To get started with moderating, editing, and deleting comments, please visit the Comments screen in the dashboard.
Commenter avatars come from Gravatar.
Comments are closed.